Preparing CRM Online + SharePoint + Exchange + Power BI Trial (Part 4)

PowerBI Integration

Power BI is a really good tool to provide self-service analytics with focus on data visualisation. Out of the box Microsoft Dynamics CRM is equipped with powerful charting capabilities. However to connect CRM data with external data, such as finance or ordering system, we usually need to do data warehousing exercise. With the availability of PowerQuery, PowerPivot and PowerView capabilities in Excel we could generate CRM dashboard with self-service filter analysis that merged with external data sources.

Preparing Excel Power View Dashboard

In this example, I will not connect to external data. But solely using the CRM lead data to show the demographics of where is the company’s most strategic places to market and sell. I will start with a basic Excel report that pulling down Lead data from CRM. Open Microsoft Excel with the latest Power Query installed. For installation of Power Query: http://www.microsoft.com/en-us/download/details.aspx?id=39379

Selects Power Query Tab, select the data source From Other Sources > From OData Feed.

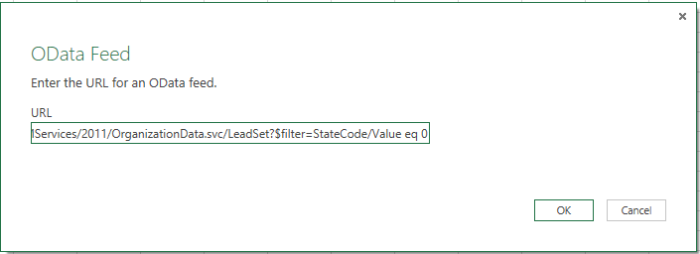
Previously I’ve made a post regarding the tips on only getting the relevant records by applying CRM OData Query in the oData feed here, so for this example, I will retrieve only open Leads:

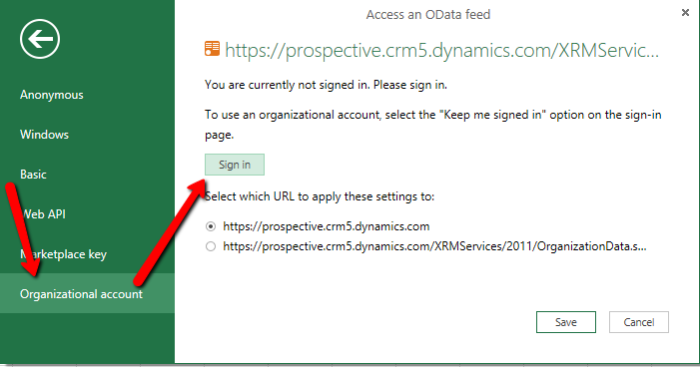
Then it will prompt the account selection, since we are on Office365 account, selects Organizational Account and click on Sign in to sign in with the Office365 account.

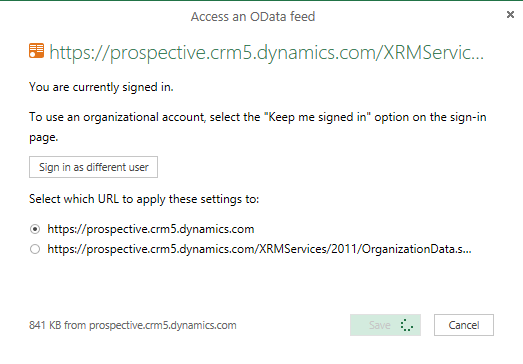
Once signed-in click on save and Power Query will do data retrieval from the CRM Server

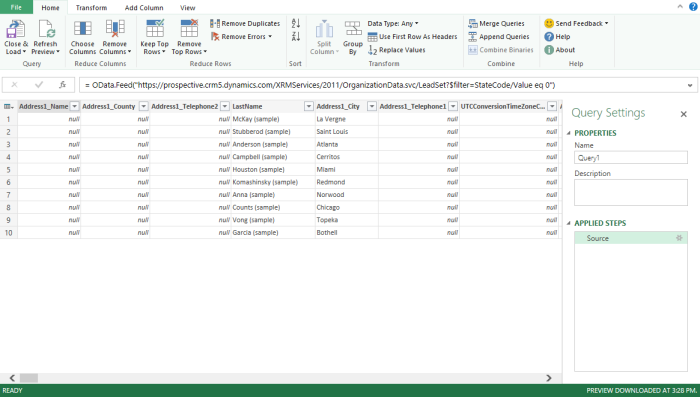
Once finished loading the CRM data, it will open up the Power Query Editor similar to:

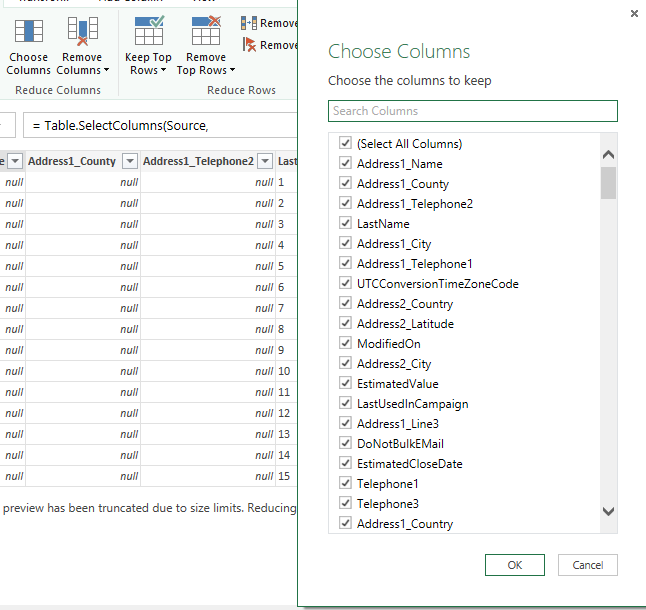
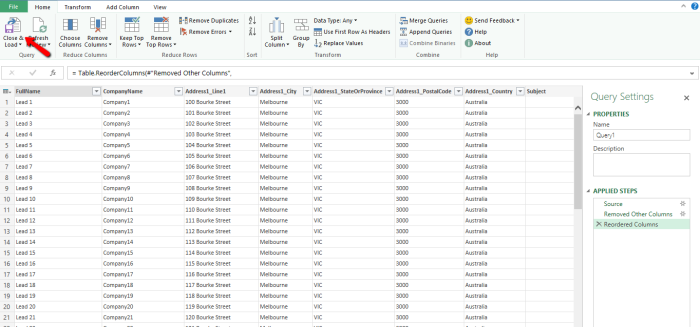
Then click on Choose Columns to select the columns that we care for this report (Full Name, Company Name, Address1_Line1, Address1_City, Address1_PostalCode, Address1_StateOrProvince, Address1_Country and Estimated Amount)

Once the columns selected, we could re-arrange the columns to make the data neat, then click on Close & Load

It will load the query and pull the data from CRM to the worksheet, it might takes some time for large dataset.

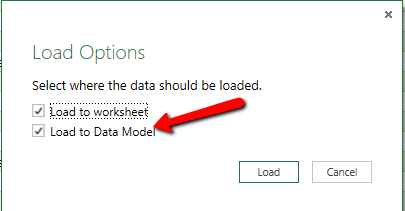
Once loaded, we need to do some Power Pivot exercise to prepare the data model and manage the address fields to be recognised as address related data by right-clicking the Query click on Load to…. Choose both worksheet and Data Model

Once loaded, click the Power Pivot Tab and Click on Manage button

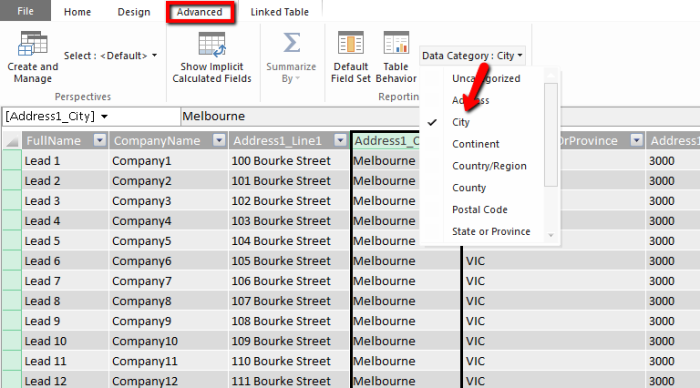
To mark the fields as address data type, click on “Advanced” tab on Power Pivot Select the columns header of the address data (street, city, state, postcode and country) and set the Data Category accordingly.

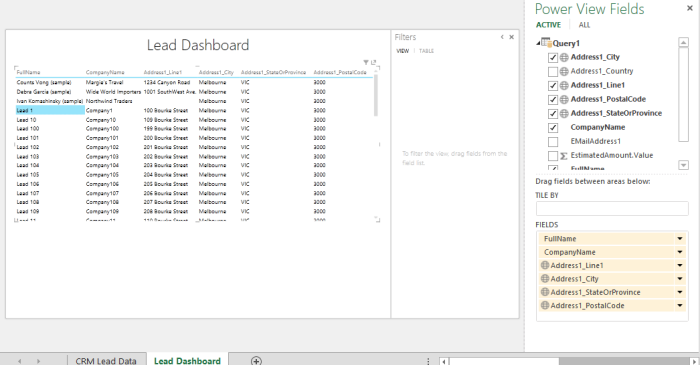
Once set, close the Power Pivot editor. To add the graphical view of this report, click on Insert tab and click on Power View

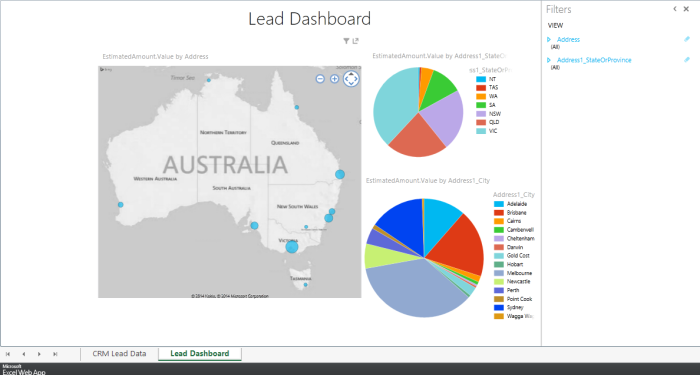
It will create a basic Power View dashboard similar to:

Then we might want to configure the dashboard to show the map and some chart by clicking on the Design tab and might be ended-up to be something like this:

Save this Excel Spreadsheet to be used later on in Power BI site.

Setting Up Power BI Site

Since previously in this example we are adding Power BI subscription from an existing CRM instance on Office365 tenant, the Power BI provisioning might not set up the Power BI SharePoint Site directly. So, I need to either a new site for Power BI or use an existing site. For this trial preparation, I will create a separate site for the Power BI purpose.

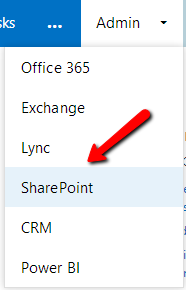
In Office365 admin portal, click on Admin navigation and click on SharePoint.

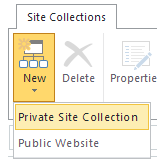
Click on New > Private Site Collection

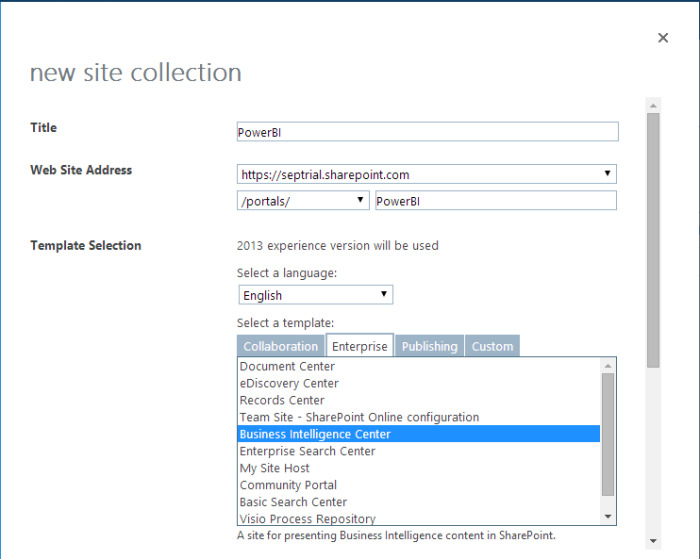
I called the site as PowerBI and use the Business Intelligence Center as the template.

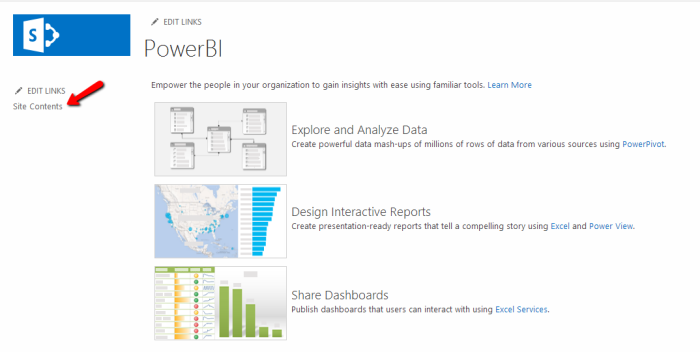
Once the site has been successfully provisioned by SharePoint, go to the site.

It will Display the default page with some instruction of BI capabilities. To add Power BI functionality to this site, click on Site Contents at the left hand side navigation.

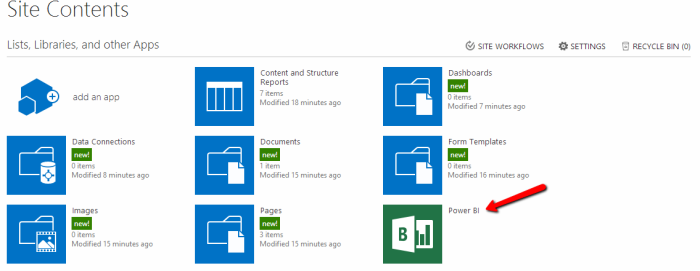
It will show the list of available components and apps to be added, click on Power BI to add Power BI functionality to the SharePoint site.

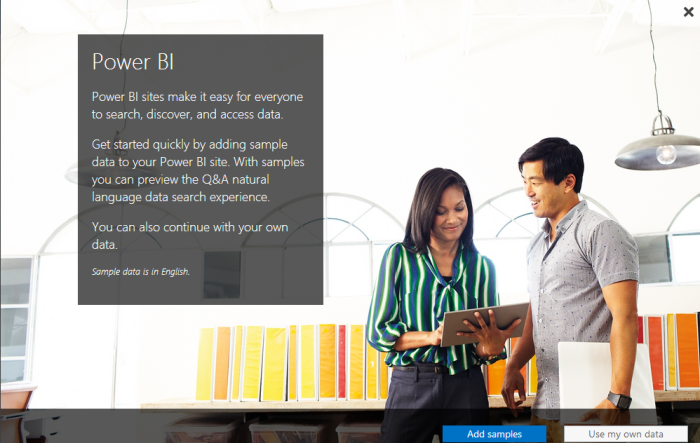
It will then showing this big banner of Power BI, I choose to Use my own data, as I’m going to use the data from CRM.

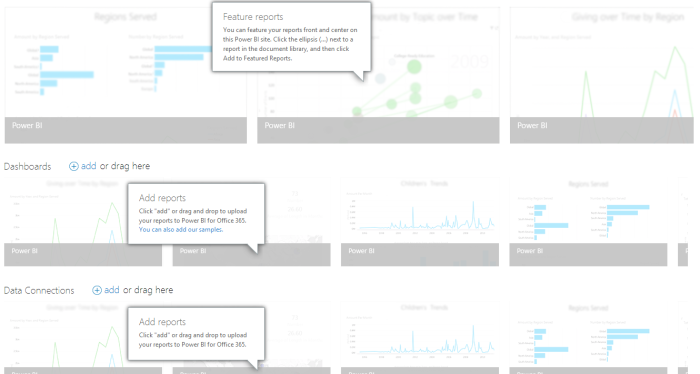
Then it will close this modal dialog window and show the main features of Power BI (Featured Reports, Dashboards and Data Connections)

On Dashboards, click on (+ add) or drag the Excel Power View Report that we create previously.
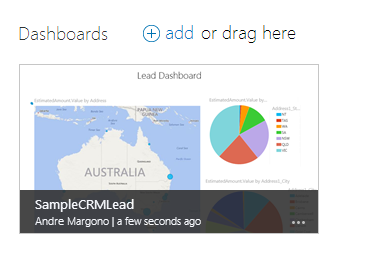
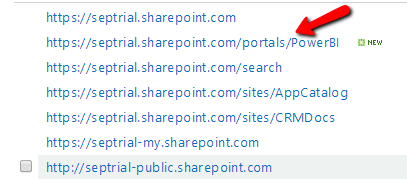
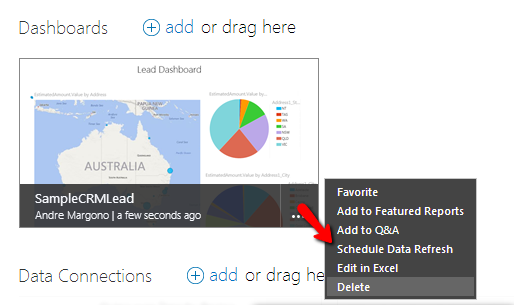
Once uploaded, click on the tile to view the dashboard. Copy and keep the URL of this page to be used later in CRM Dashboard iFrame setup, the URL will be similar to: https://septrial.sharepoint.com/portals/PowerBI/_layouts/15/WopiFrame.aspx?action=embedview&sourcedoc=%7b85c0bf22-01a7-400e-91f3-ae91b174e110%7d

One of the coolest feature of Power BI is to set data refresh. Click on … at the bottom right of the dashboard tile to schedule the data refresh.

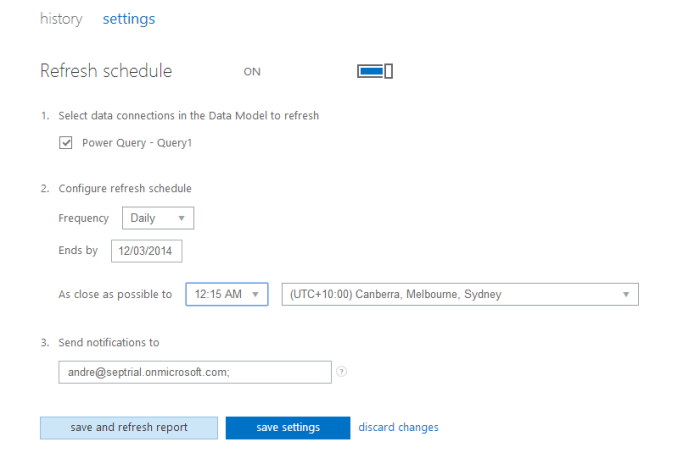
The refresh schedule provides intuitive scheduling functionality for us to schedule data refresh:


Edit: Based on the list of external data that currently supported, it seems scheduled refresh for data from CRM Online is not supported yet. So, I think this is a feature that would be nice to be supported soon. It will resulting into an error of data refresh like:

Ref: http://office.microsoft.com/en-us/office365-sharepoint-online-enterprise-help/use-external-data-in-workbooks-in-sharepoint-online-HA104054001.aspx

CRM Dashboard Setup

To get the Power BI Report to be shown in CRM’s Dashboard we could not use Personal Dashboard and we need to use System Dashboard due to iFrame Cross-Frame Scripting limitation on personal dashboard.

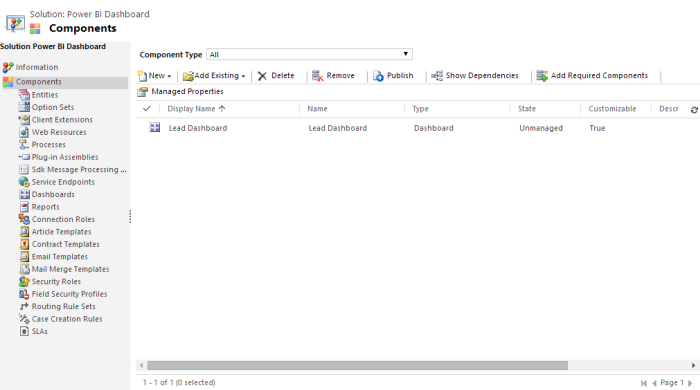
So, for this example, I created a brand new Solution called “Power BI Dashboard” and create new Dashboard and named it as “Lead Dashboard”

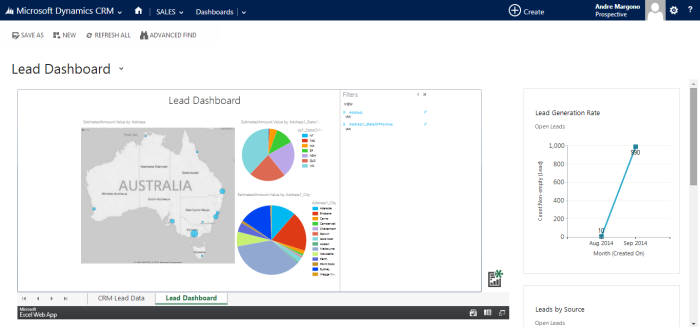
In this Dashboard, I added an iFrame component. Important: uncheck the cross frame scripting to ensure the dashboard works properly.

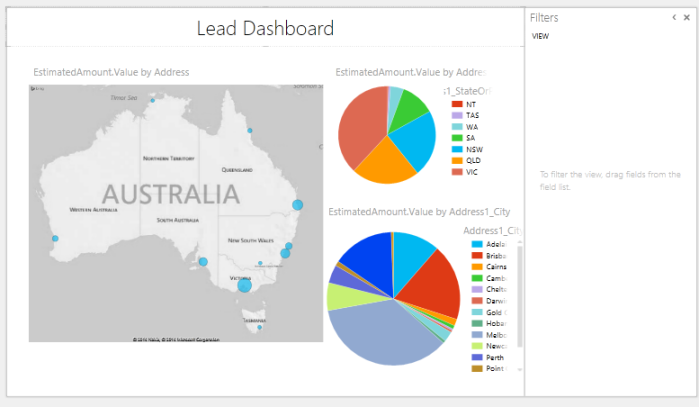
And then add a couple CRM charts and views to completely assemble a simple Lead Dashboard in CRM that integrated with Power BI:

Conclusion

Setting up Dynamics CRM with other Microsoft stacks on the cloud (Friends), is so much easier than deploying each individual components On-Premise. This whole example setup can be completed in a small number of hours to setup, where if these setup took place On-Premise it could take a couple of days of effort to setup. A big thanks to Microsoft cloud services, especially the CRM Online and Office365 team to keep improving the experience in their cloud services provisioning.

Special thanks for Sarah Ashton to provide the feedback before I posted this series 🙂


The whole series of “Preparing CRM Online + SharePoint + Exchange + Power BI Trial”:

Preparing CRM Online + SharePoint + Exchange + Power BI Trial (Part 3)

Setting Up Server-based SharePoint Integration

Dynamics CRM Online Spring’14 release introduced the new Server-based SharePoint Document Integration. How it works? Scott Durrow has discussed the detail of the new SharePoint Integration in 2 parts:

http://develop1.net/public/post/SharePoint-Integration-Reloaded-Part-1.aspx

http://develop1.net/public/post/SharePoint-Integration-Reloaded-Part-2.aspx

Before configuring the CRM side of SharePoint Integration, of course we need to setup the SharePoint site that will be used as the document location. Navigate to Office365 Admin Portal, click on Admin > SharePoint

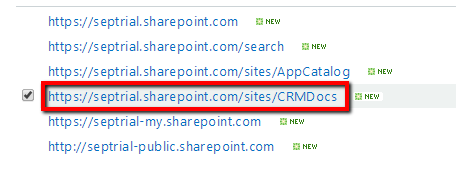
It will open the list of SharePoint site collections, for CRM document specific I create a new site called CRMDocs to separate this documents from other SharePoint team sites.

If you would like to skip this step and configure Power BI straight away, click here to jump to Part 4.

Note: The following site creation process is applicable to both Online and On-Premise SharePoint deployment models. The difference is that by the time I’m writing this example, Server-based SharePoint document integration is only available on CRM Online. I hope this model will come down to On-Premise deployment as well to have the seamless integration between these two awesome technologies.


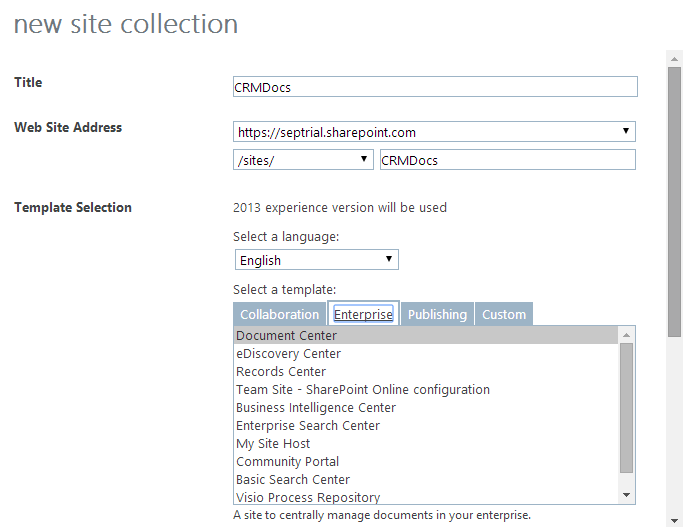
To create a new site, click on New and select Private Site Collection:

I chose Document Center from the template:

When SharePoint finished working on it… grab the URL of this SharePoint site to be used in CRM configuration.

To get started on setting up the Server-based SharePoint Integration, if your CRM Online instance has not been configured with the Server-Based SharePoint Integration or you have not dismissed the notification to enable, it will show the notification below the CRM Navigation area.

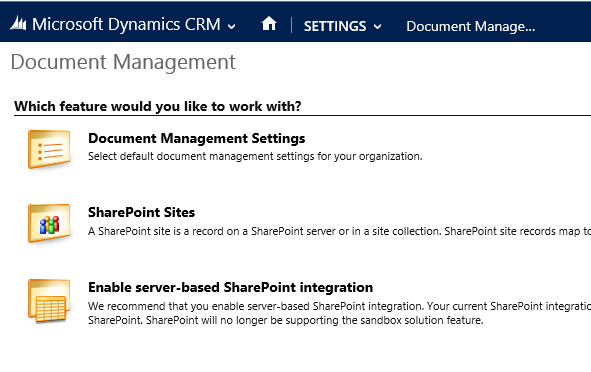
If you have dismissed this notification, you could go to Settings > Document Management > Enable Server-Based SharePoint Integration

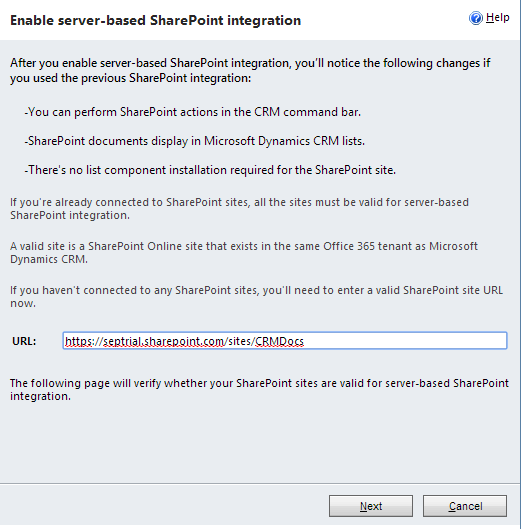
It will open up the window to configure the SharePoint URL, copy and paste the SharePoint site URL that configured previously:

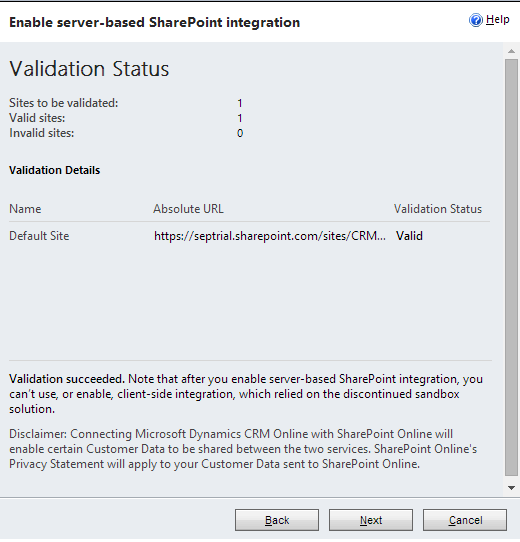
Click on Next and it will open up some validation whether the SharePoint site that we are referring is valid to be used for Dynamics CRM document repository. Important: Please read the Note and Disclaimer below the validation to ensure it does not break any of your privacy policy and once server-based integration, the older client-side integration can’t be enabled/used anymore.

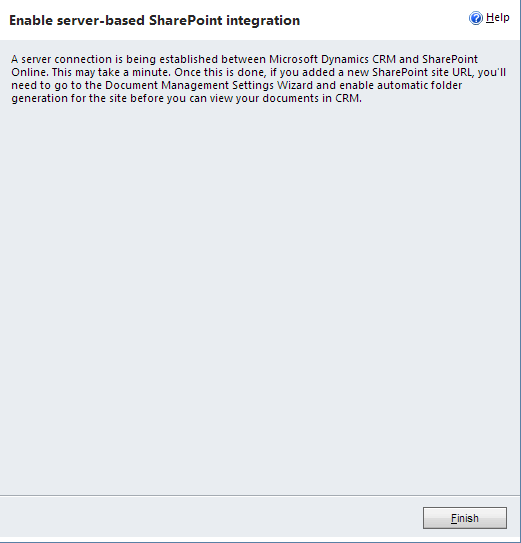
Click on Next and it will show the final screen

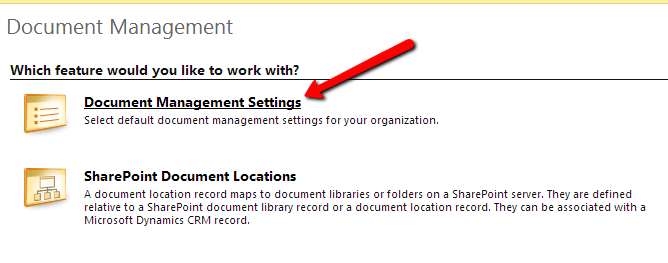
Wait, it’s not over yet, once the server-based SharePoint Integration’s been established, we still need to configure the folder generation (see the final screen message). Navigate to Settings > Document Management > Document Management Settings

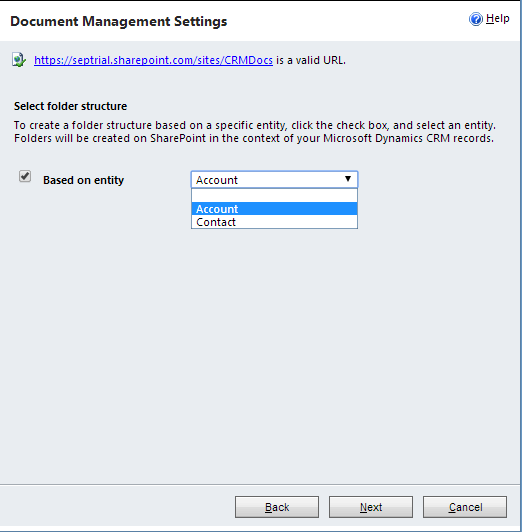
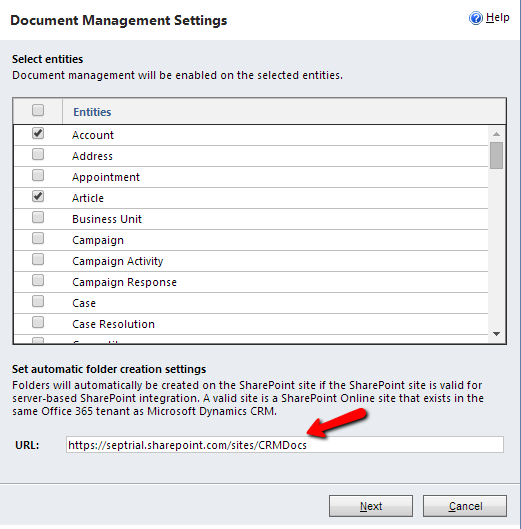
Now we will be given the selection on which entities that we want to have SharePoint Document Integration to be enabled. And fill the same SharePoint URL that provided in the Server-based SharePoint Integration setup before.

Next, the configuration screen will show the folder structure selection. There are 3 options available:

  1. Not Based on Entity
  2. Based on Entity: Account
  3. Based on Entity: Contact

The detail of this structure is described in this Dynamics CRM Customer Center page: http://www.microsoft.com/en-us/dynamics/crm-customer-center/manage-sharepoint-documents-from-within-microsoft-dynamics-crm.aspx

And Magnetism Solutions’ Colin Maitland has thoroughly draw the folder structure diagram of SharePoint’s Document Integration

http://www.magnetismsolutions.com.au/blog/colinmaitland/2014/04/27/planning-for-microsoft-dynamics-crm-2013-and-microsoft-sharepoint-2013-2010-document-management-integration-part-2

The selection of the 3 options is completely depends on how you work with CRM, some common examples:

Not Based on Entity folder structure might be good if you would like to group the documents based on each entities (flat structure, this is common in xRM implementation that not using much of CRM sales/service/marketing capabilities).

Based on Entity: Account folder structure might be best fit if you are using sales process that based on B2B scenario where businesses are your primary customers.

Based on Entity: Contact folder structure might be best fit if you are using sales process that based on B2C scenario where individuals are your primary customers.

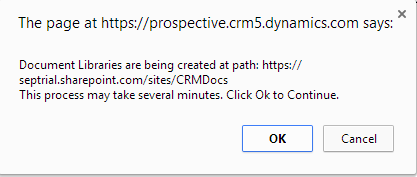
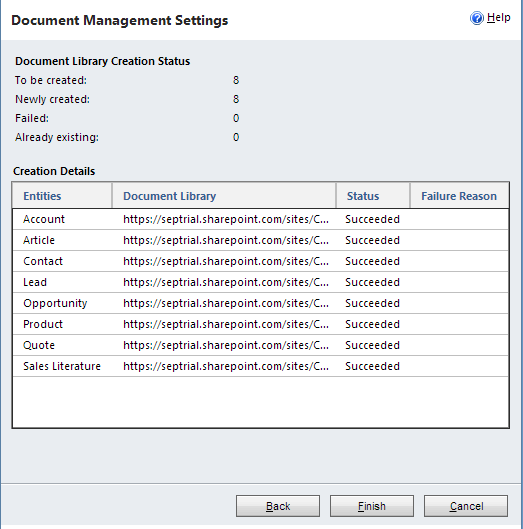
Once decided on which folder structure option that will be used for SharePoint document integration, click on Next. The configuration will show an alert that the document libraries are being created and showing the progress of the creation:

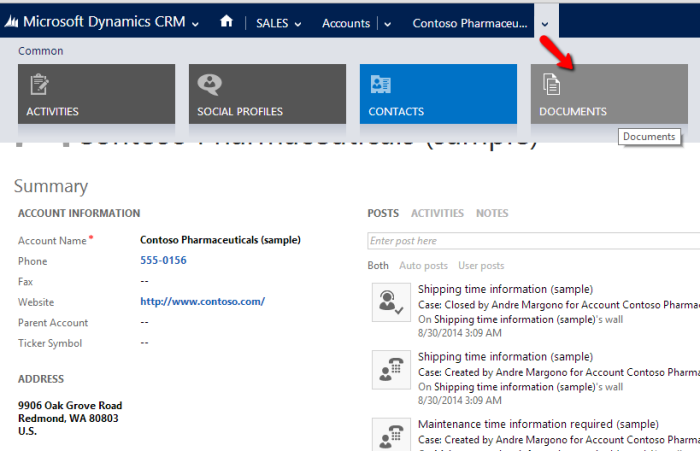
Congratulations, you now have SharePoint Document Integration configured. Now it’s the time to see it in action. Since for this example I have selected the folder structure “Based on Entity: Account”, let’s open an existing account record and open the Documents associated view.

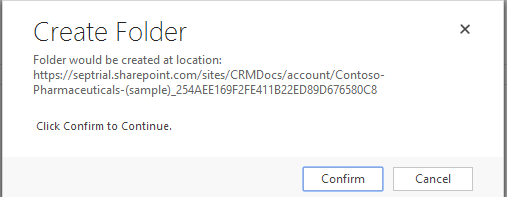
If it’s the first time you open the Documents associated view, it will prompt you to confirm of that particular record folder creation in SharePoint. Note: the previous folder creation during the Document Management Settings configuration is only creating the base folder structure that does not create the “child” individual folder for each records in CRM.

In case you clicked on cancel, you still be able to add the location from the associated view command button:

Once finished you could upload the documents into SharePoint seamlessly from CRM

To open the folder in SharePoint, click the OPEN SHAREPOINT command button, it will open up the SharePoint document list similar to this. Note: since I configured the document structure as Based on Entity: Account, there is opportunity folder created, as I tried to upload a document in this account’s related opportunity.

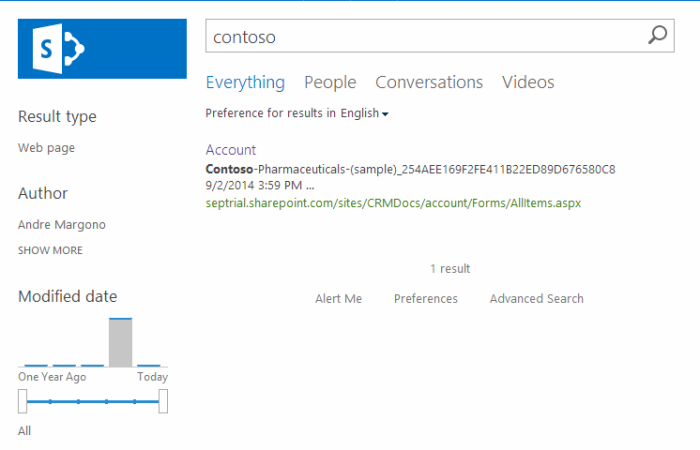
The good thing about SharePoint Integration, depends on your SharePoint Search configuration, you could use SharePoint Search to search your documents:

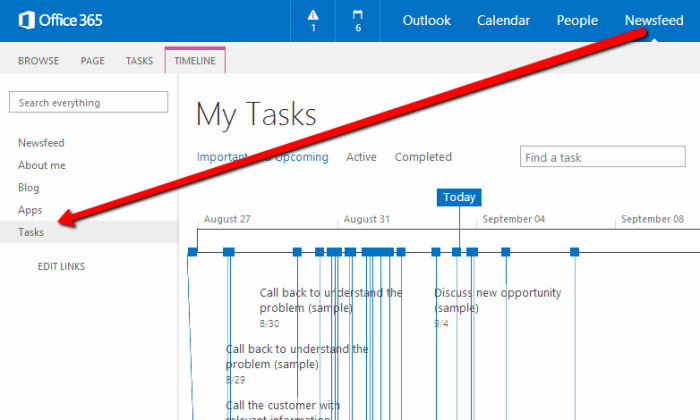
Tips on “Better Together”-ness between CRM, Exchange and SharePoint is the Task Synchronisation between Exchange and SharePoint. Since we have established the Server-Side Exchange Integration between CRM and Exchange Online, the tasks synced from CRM to Exchange online is synced to your Newsfeed and we will have a great timeline of the tasks on our Office365 portal.

Next, moving on to the final part, Part 4  here

Preparing CRM Online + SharePoint + Exchange + Power BI Trial (Part 2)

Setting Up Server-Side Exchange Integration

Pre-requisite:

Before setting up the Server-Side Exchange Integration, make sure that the user has been assigned with the Exchange License (similar to my previous tips here) and has the email address set up properly to ensure the smooth integration with CRM.

CRM Configuration:

On CRM instance, navigate to Settings > Email Configuration then configure the Email Server Profiles. By default CRM Online will create the Exchange Online profile if the Exchange Online is on the same Office365 instance.

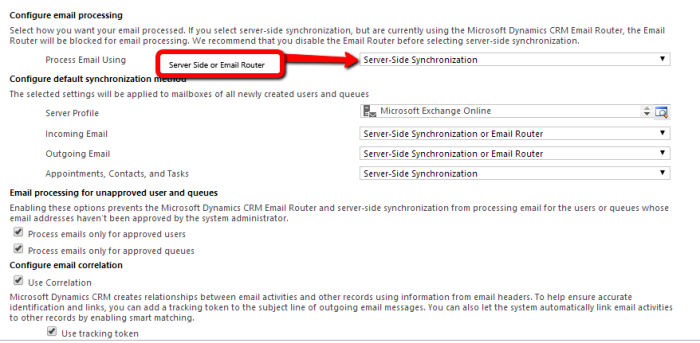
Then go back to Settings > Email Configuration > Email Configuration Settings to set the CRM-wide email configuration.

For this example, I’ll use pure Server-Side Exchange Sync to sync both incoming and outgoing emails and also task, appointment and contacts. Email router obviously is another option, but since it is cloud deployment and on same Office365 tenant, it’s better to use the technologies that based on Office365 as well. Another option if you know that the people in your organisation uses Outlook desktop client, instead of the OWA, you could configure the Incoming Email, Outgoing Email, Appointments, Contacts and Tasks to use Outlook client.

Once the system-wide email configuration has been setup properly, make sure to approve and test & enable the mailboxes to ensure that the users are able to send emails, otherwise an error message similar to this will pop-up when trying to send email in CRM:

To approve and test & enable the mailboxes, navigate to Settings > Email Configuration > Mailboxes, then select the mailboxes that need to be approved and after it’s approved, Click on Test & Enable button.

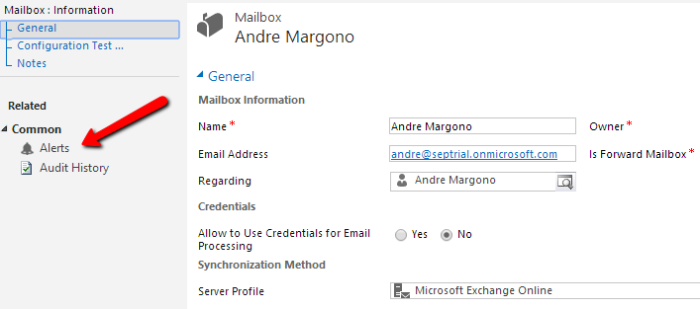
Open the mailbox detail to see whether the tests successful or not:

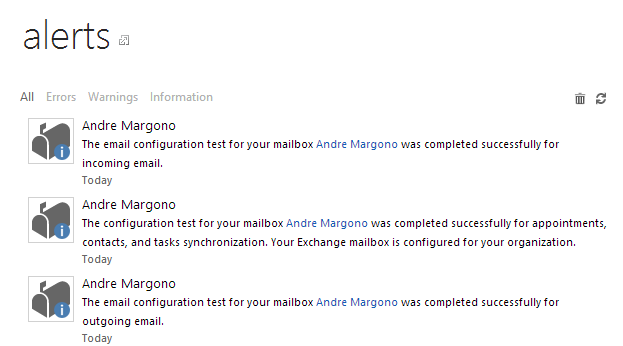
The log of success/error will be listed up under the “Alert” view of the Mailbox record:

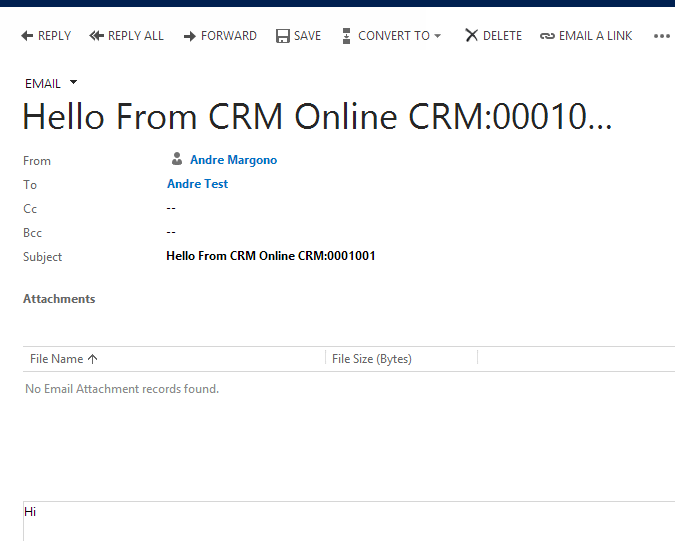
Now, it’s the time to try this server-sync functionality. I tried it by opening a contact with my work email address and send an email activity:

And it comes through to my desktop outlook client:

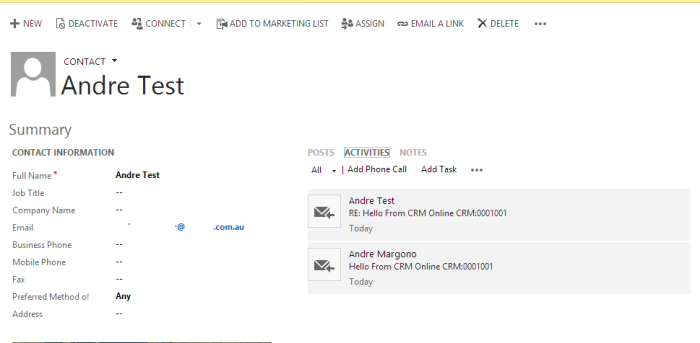
And I reply back to the email and it’s tracked on the contact’s activity conversation:

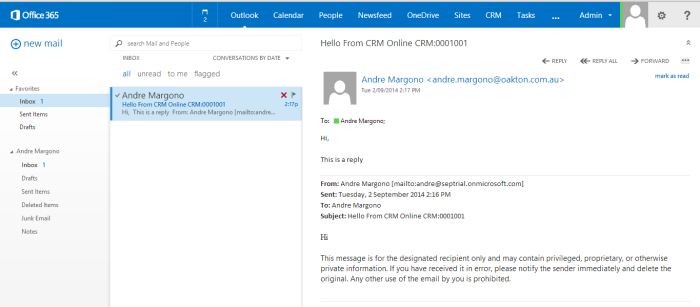
To check whether the server-side synchronisation works on the server side, open the email on Outlook OWA page:

And the tasks are also synced:

References:

http://msdn.microsoft.com/en-us/library/jj863707.aspx

http://www.microsoft.com/en-us/dynamics/crm-customer-center/set-up-email-through-server-side-synchronization.aspx


Moving on to Part 3 here

The whole series of “Preparing CRM Online + SharePoint + Exchange + Power BI Trial”:

Preparing CRM Online + SharePoint + Exchange + Power BI Trial (Part 1)

This article will run through the process provisioning of CRM, SharePoint, Exchange Online and Power BI trial, then will discuss on how to setup of the integration between these services as it’s been frequently asked by colleagues and in forum.

First step is registering for the CRM Online trial. In case, anyone got caught in the license assignment issue of the CRM Online trial, look at my previous blog post here. To register for CRM Online, visit: http://go.microsoft.com/fwlink/?LinkId=252780 and fill-in your details:

Tips: It’s advisable to use private browsing/incognito windows when you are signing up for any kind of Office365 services to clear out any existing Office365 sessions.

Keep moving on with the process and wait until the provisioning finished.

Once your Dynamics CRM trial provisioned properly, add the other Office365 trial (SharePoint, Exchange and Power BI) by opening the Office365 admin portal: https://portal.office.com/default.aspx

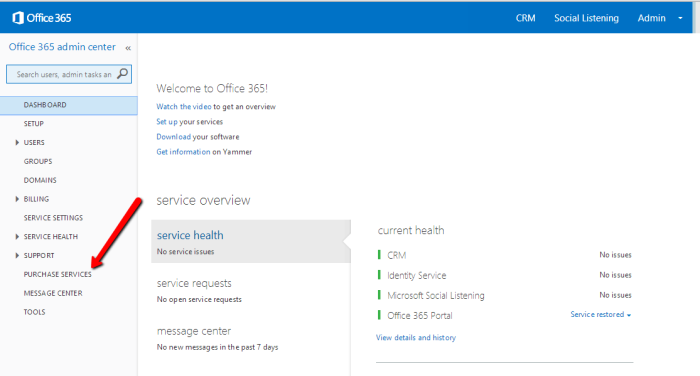
And click on Purchase Services navigation


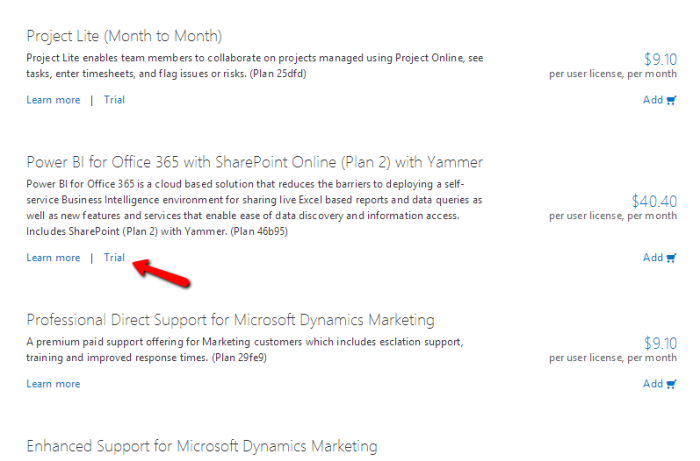
Selects Trial for: Power BI for Office 365 with SharePoint Online (Plan 2) with Yammer and confirm your order.

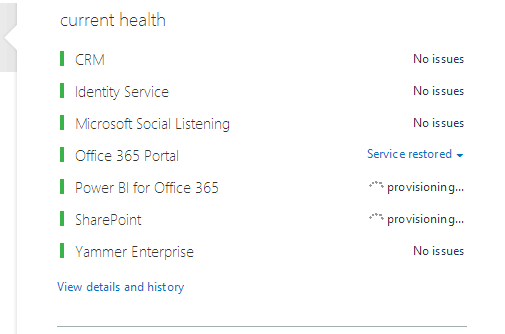
On the admin portal dashboard it will show the status of SharePoint and PowerBI is currently being provisioned:

To add Exchange Online service, go back to Purchase Services and select the Office365 ProPlus Trial

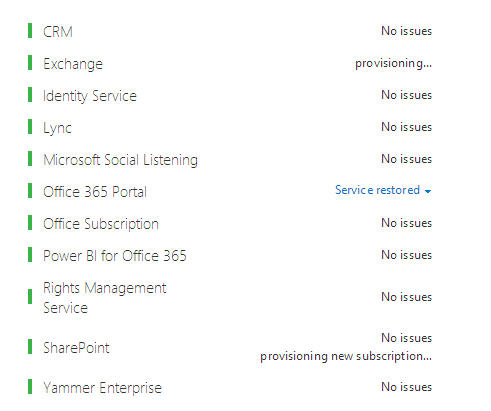
Once the order confirmed, it will redirect back to the Admin portal and showing that it is currently provisioning the Exchange, Lync and another SharePoint Online

Wait until these services ready.

Tips: Changing the CRM Organisation Detail

A quick tips to change your CRM organisation details: By default the organisation name assigned to your CRM instance will be your company name provided during the trial sign-up and the organisation URL will be related to the username specified during the sign-up process. For demo purpose the organisation name might need to be changed to the prospect’s company name. To change the CRM organisation name:

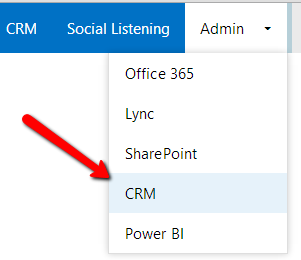
On Office365 admin portal, click on Admin navigation and select CRM

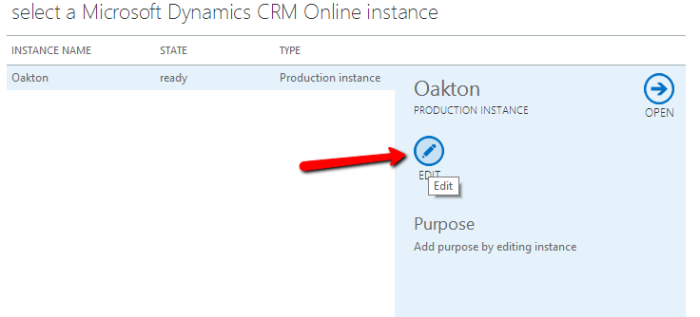
It will open the CRM administrative functionality, such as managing your instance and sandboxes. To change the organisation name, click on Edit button on the organisation that you wish to be renamed:

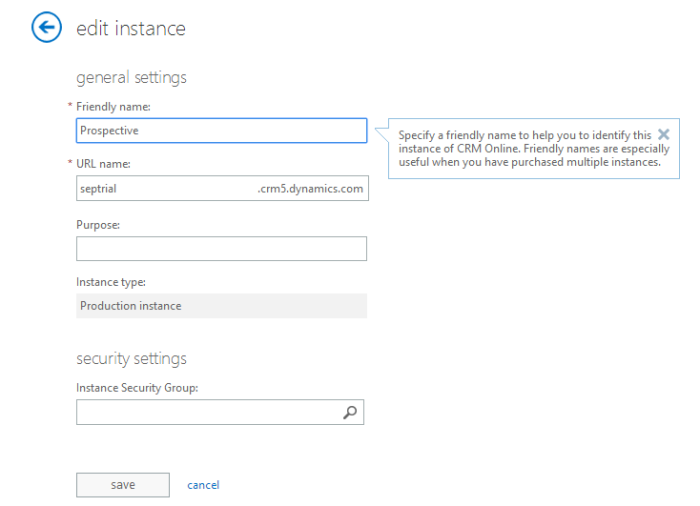
Rename the Friendly name and/or the URL Name and click save:

Now notice that the CRM Online Organisation is re-named as the new one:


Moving on to Part 2 here

The whole series of “Preparing CRM Online + SharePoint + Exchange + Power BI Trial”:
Experiment: Data Analysis From Crowd-Sourcing of Indonesian Election Votes Using PowerBI
Disclaimer: this post is solely for experimental purpose without any intention to support any side of the political group. The data source used in this experiment is based on crowd-sourcing effort based on the official data, any error or misuse of the data solely based on the combination of effort from crowd sourcing. The author of this blog completely neutral and does not have any attempt to highlight any party. Important: this is not official page of Indonesian Election Commission.

My home country is currently waiting for the final outcome of their presidential election. The official result and data is going to be announced in 22th July 2014. With the transparency in the Indonesian government that released the scanned copy of the official counting in their official website: http://pilpres2014.kpu.go.id/ triggered the initiation of some local IT experts to develop open-source crowd-sourcing platforms such as: http://kawalpemilu.org/#0, http://kawal-suara.appspot.com/ and http://rekapda1.herokuapp.com/ to consolidate the data from thousands of voting booths.

With the availability of the data from these platforms combined with Excel’s PowerBI capability I experimented to extract the data of the votes and analyse the result and distribution of the votes based on each provinces.

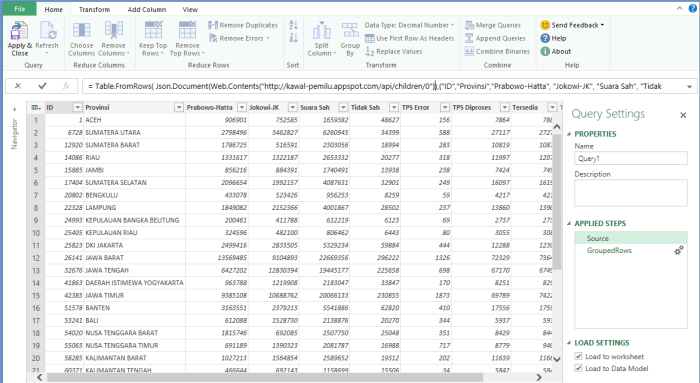
To start with this analysis, I did a bit of inspection on http://kawalpemilu.org/script to get their data feed and make it the data source in PowerQuery.

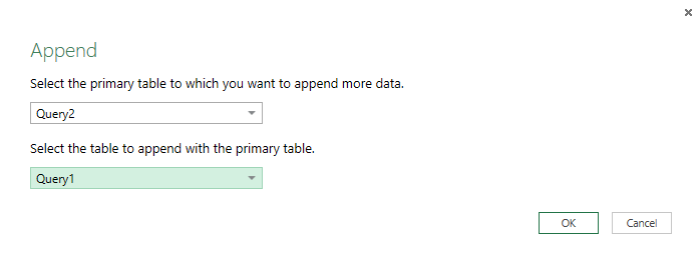
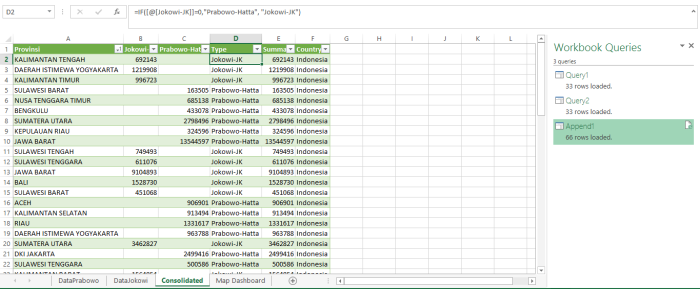
To achieve the comparison between the two candidates, I need to create 2 separate queries for each candidates and combine the query using append functionality.

That resulting the consolidated query with the comparison of the total votes for each candidates. With a simple excel formula, I create Type column to be used in PowerView map as key of the candidates.

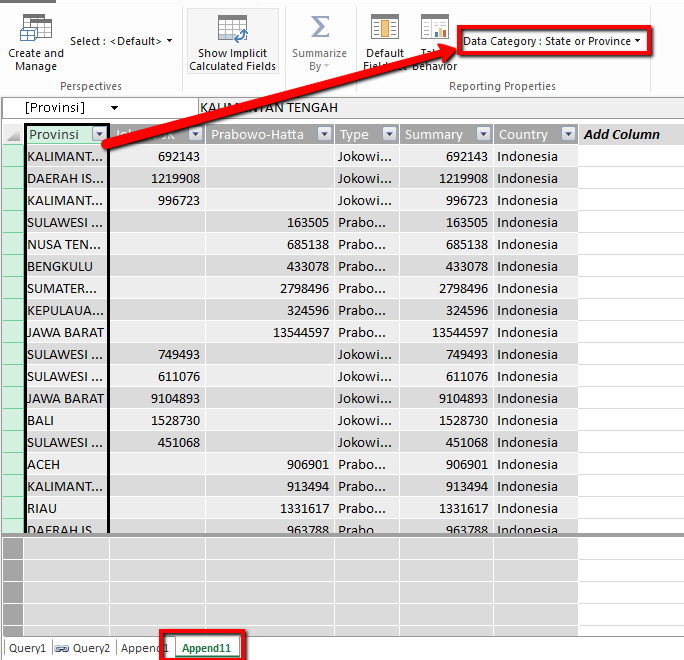
Now I have the required data to generate the PowerView distribution map. However before the data becomes usable for Map control in PowerView, I need to change the Province and Country column behaviour as geographic data using PowerPivot.

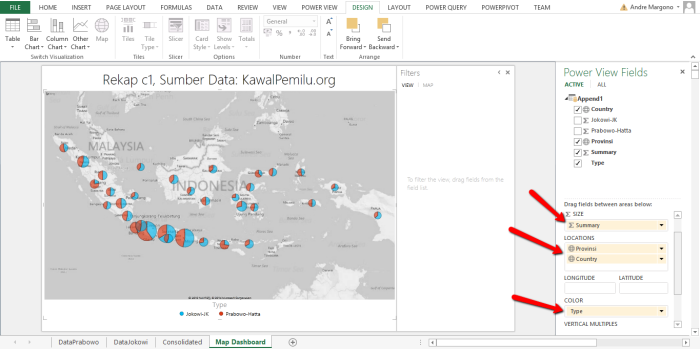
Now the data is ready to be used in Map control in PowerView. To create the PowerView, navigate to Insert > Reports > PowerView in Excel ribbon bar.

With minor configuration the geographical distribution is displayed on PowerView Map.

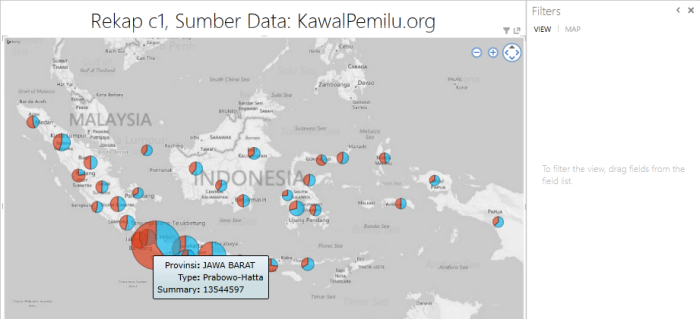
With the detail of distribution of the votes on each candidates based on the geographical location:

The source Excel file is available here: KawalSuaraDashboard

I pray that the final outcome can be announced without any commotion next week.

Conclusion

PowerBI with Excel is really useful to generate geographical representation of the data. Obviously this is really useful in CRM world to get customers, competitors and partners data visualisation.


Enable Dynamics CRM oData Query Filter for PowerQuery Performance

Recently I’ve been experimenting with the PowerBI and Excel self-service BI for Dynamics CRM, which has been discussed by CRM MVP Jukka Niiranen on: http://niiranen.eu/crm/2013/12/connecting-crm-online-odata-feed-excel-2013-power-query/ and PowerBI’s blog: http://blogs.msdn.com/b/powerbi/archive/2013/12/19/dynamics-crm-online-in-power-query.aspx last year.

Last Tuesday on Melbourne CRM User Group, Rowan Miller also excellently presented the functionality with localised content (Australian geographical data): http://www.meetup.com/MelCRMUG/events/170962872/

One thing that annoys me is the performance when connecting to CRM web service: https://(CRMServer)/xrmservices/2011/OrganizationData.svc where this endpoint will return all entities that can be queried, thus the performance of each refresh and initiation is absorbed.

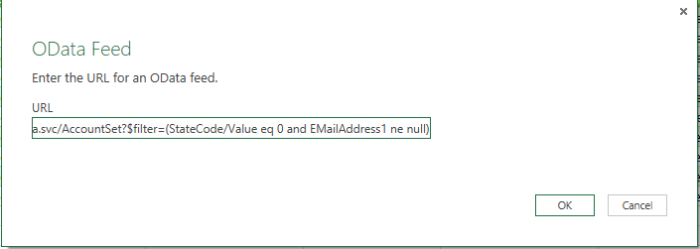
Out of my experiment, theoretically if it could retrieve the data through the oData endpoint, it should be able to get the data after the filter. So, I tried to retrieve the data using the oData filter, e.g: 

https://(CRMServer)/xrmservices/2011/OrganizationData.svc/AccountSet?$filter=(StateCode/Value eq 0 and EMailAddress1 ne null) to get the Active accounts and has email address. Additionally, we could include which fields that need to be retrieved.

The performance of early initiation and data refresh is improved, as the query is handled through the oData query level, instead of pulling all data using PowerQuery.

As always, the best tool to build oData query is: oData Query Designer by CRM MVP Rhett Clinton: http://dynamicsxrmtools.codeplex.com/