Setting Up Server-based SharePoint Integration
Dynamics CRM Online Spring’14 release introduced the new Server-based SharePoint Document Integration. How it works? Scott Durrow has discussed the detail of the new SharePoint Integration in 2 parts:
http://develop1.net/public/post/SharePoint-Integration-Reloaded-Part-1.aspx
http://develop1.net/public/post/SharePoint-Integration-Reloaded-Part-2.aspx
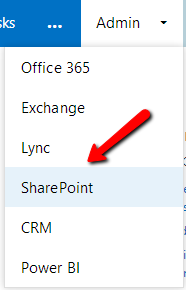
Before configuring the CRM side of SharePoint Integration, of course we need to setup the SharePoint site that will be used as the document location. Navigate to Office365 Admin Portal, click on Admin > SharePoint
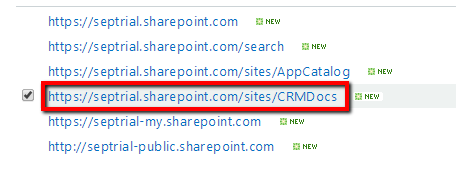
It will open the list of SharePoint site collections, for CRM document specific I create a new site called CRMDocs to separate this documents from other SharePoint team sites.
If you would like to skip this step and configure Power BI straight away, click here to jump to Part 4.
Note: The following site creation process is applicable to both Online and On-Premise SharePoint deployment models. The difference is that by the time I’m writing this example, Server-based SharePoint document integration is only available on CRM Online. I hope this model will come down to On-Premise deployment as well to have the seamless integration between these two awesome technologies.
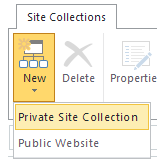
To create a new site, click on New and select Private Site Collection:
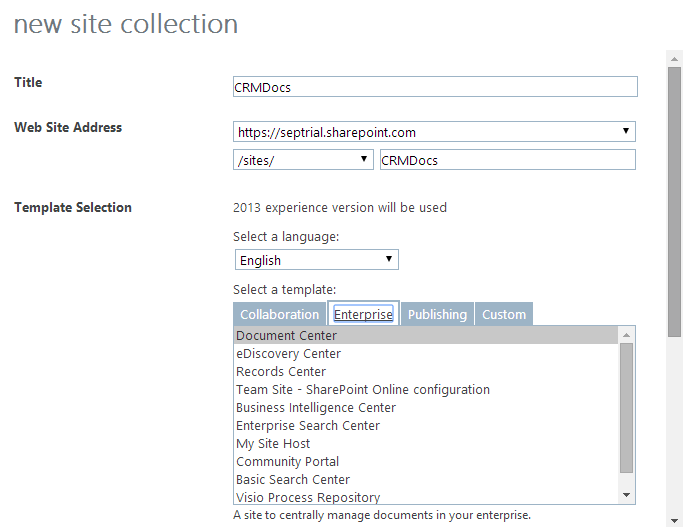
I chose Document Center from the template:
When SharePoint finished working on it… grab the URL of this SharePoint site to be used in CRM configuration.
To get started on setting up the Server-based SharePoint Integration, if your CRM Online instance has not been configured with the Server-Based SharePoint Integration or you have not dismissed the notification to enable, it will show the notification below the CRM Navigation area.
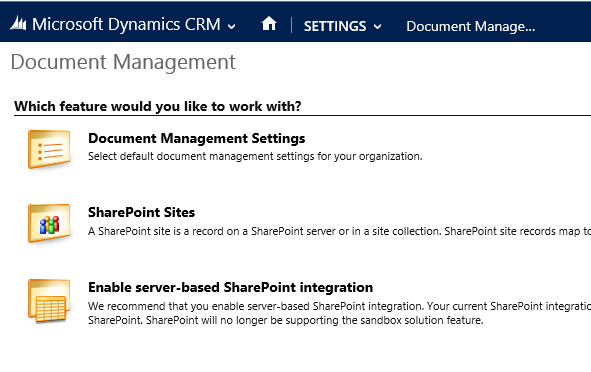
If you have dismissed this notification, you could go to Settings > Document Management > Enable Server-Based SharePoint Integration
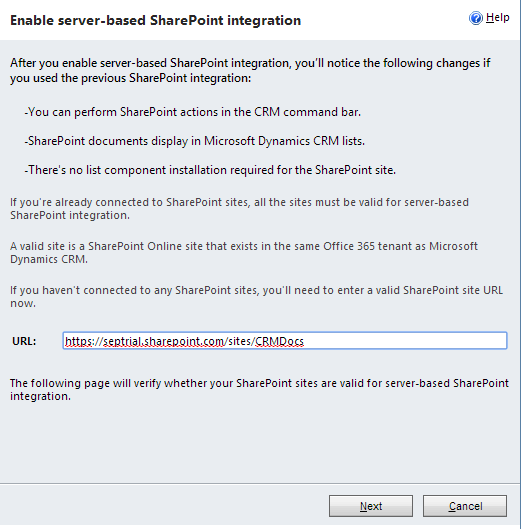
It will open up the window to configure the SharePoint URL, copy and paste the SharePoint site URL that configured previously:
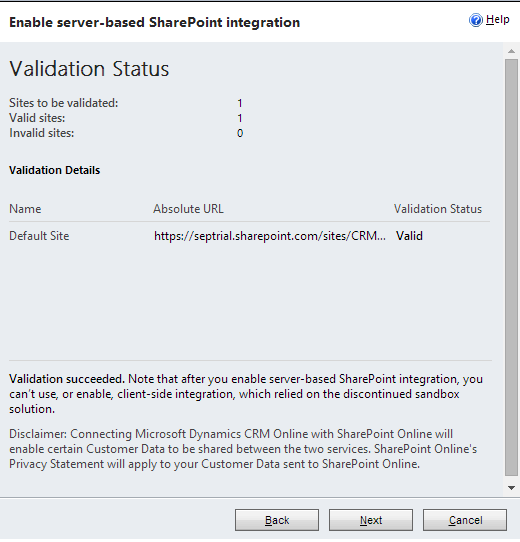
Click on Next and it will open up some validation whether the SharePoint site that we are referring is valid to be used for Dynamics CRM document repository. Important: Please read the Note and Disclaimer below the validation to ensure it does not break any of your privacy policy and once server-based integration, the older client-side integration can’t be enabled/used anymore.
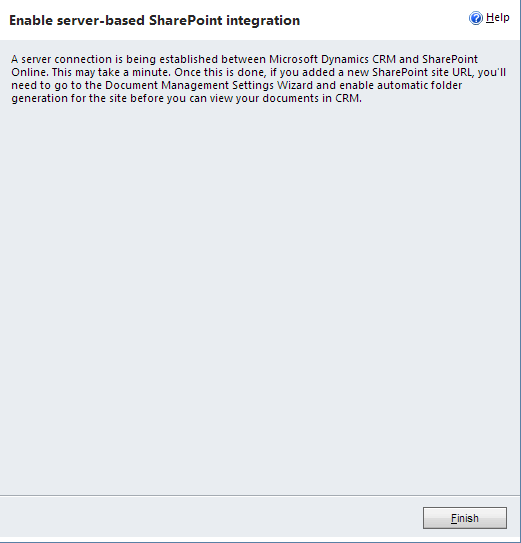
Click on Next and it will show the final screen
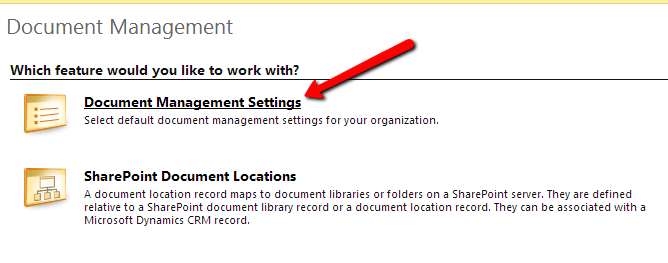
Wait, it’s not over yet, once the server-based SharePoint Integration’s been established, we still need to configure the folder generation (see the final screen message). Navigate to Settings > Document Management > Document Management Settings
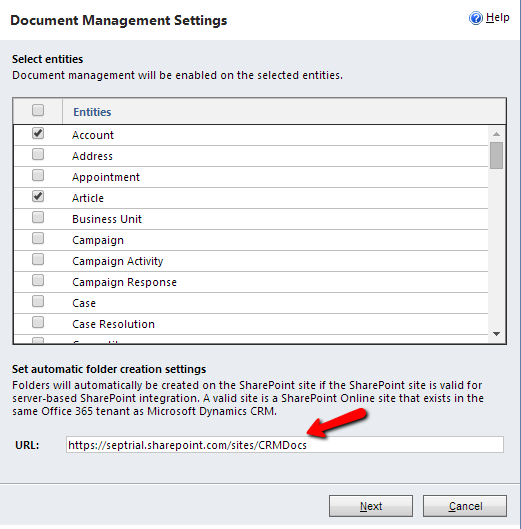
Now we will be given the selection on which entities that we want to have SharePoint Document Integration to be enabled. And fill the same SharePoint URL that provided in the Server-based SharePoint Integration setup before.
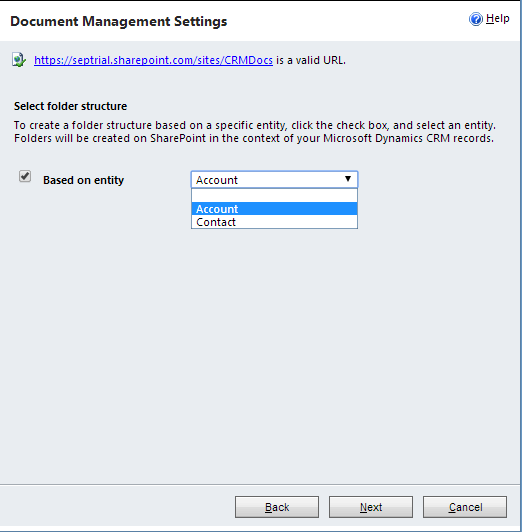
Next, the configuration screen will show the folder structure selection. There are 3 options available:
- Not Based on Entity
- Based on Entity: Account
- Based on Entity: Contact
The detail of this structure is described in this Dynamics CRM Customer Center page: http://www.microsoft.com/en-us/dynamics/crm-customer-center/manage-sharepoint-documents-from-within-microsoft-dynamics-crm.aspx
And Magnetism Solutions’ Colin Maitland has thoroughly draw the folder structure diagram of SharePoint’s Document Integration
The selection of the 3 options is completely depends on how you work with CRM, some common examples:
Not Based on Entity folder structure might be good if you would like to group the documents based on each entities (flat structure, this is common in xRM implementation that not using much of CRM sales/service/marketing capabilities).
Based on Entity: Account folder structure might be best fit if you are using sales process that based on B2B scenario where businesses are your primary customers.
Based on Entity: Contact folder structure might be best fit if you are using sales process that based on B2C scenario where individuals are your primary customers.
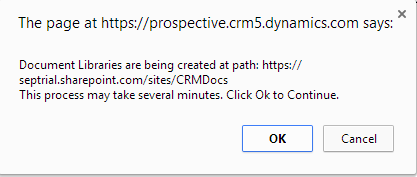
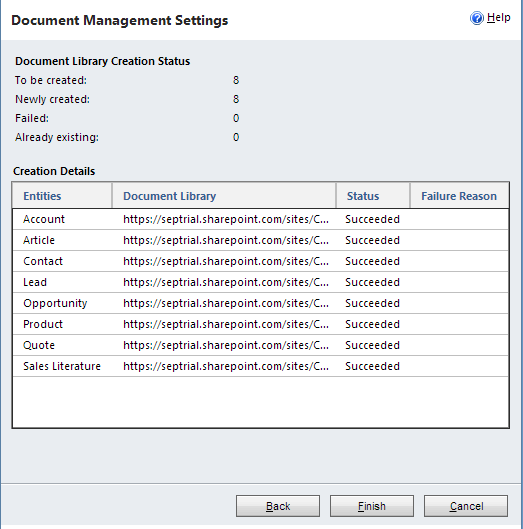
Once decided on which folder structure option that will be used for SharePoint document integration, click on Next. The configuration will show an alert that the document libraries are being created and showing the progress of the creation:
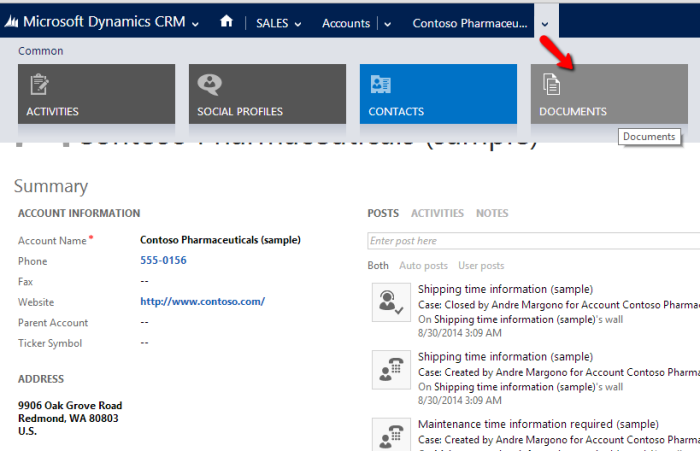
Congratulations, you now have SharePoint Document Integration configured. Now it’s the time to see it in action. Since for this example I have selected the folder structure “Based on Entity: Account”, let’s open an existing account record and open the Documents associated view.
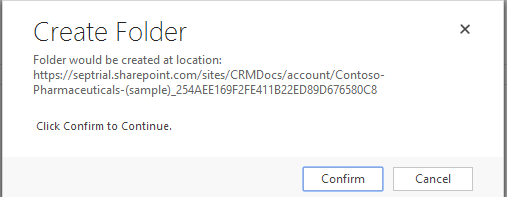
If it’s the first time you open the Documents associated view, it will prompt you to confirm of that particular record folder creation in SharePoint. Note: the previous folder creation during the Document Management Settings configuration is only creating the base folder structure that does not create the “child” individual folder for each records in CRM.
In case you clicked on cancel, you still be able to add the location from the associated view command button:
Once finished you could upload the documents into SharePoint seamlessly from CRM
To open the folder in SharePoint, click the OPEN SHAREPOINT command button, it will open up the SharePoint document list similar to this. Note: since I configured the document structure as Based on Entity: Account, there is opportunity folder created, as I tried to upload a document in this account’s related opportunity.
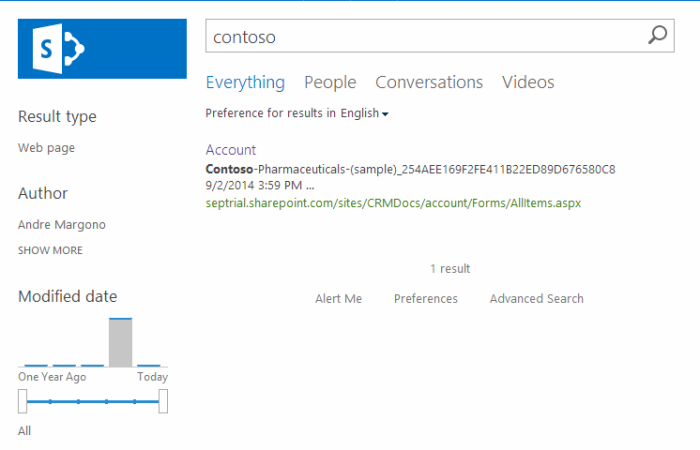
The good thing about SharePoint Integration, depends on your SharePoint Search configuration, you could use SharePoint Search to search your documents:
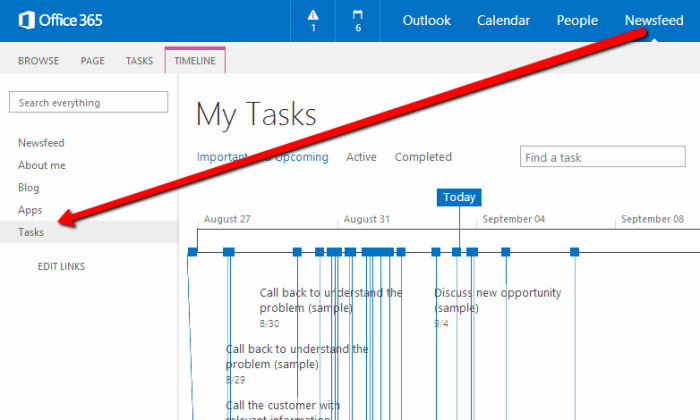
Tips on “Better Together”-ness between CRM, Exchange and SharePoint is the Task Synchronisation between Exchange and SharePoint. Since we have established the Server-Side Exchange Integration between CRM and Exchange Online, the tasks synced from CRM to Exchange online is synced to your Newsfeed and we will have a great timeline of the tasks on our Office365 portal.
Next, moving on to the final part, Part 4 here

