Recently I had a chance to do a couple of data migration & integration projects for Dynamics CRM. On these projects, the ISV product that we chose is Dynamics CRM SSIS Connector by KingswaySoft. I got a great support from my MVP role model, Daniel Cai, during the project.
In this post, I would like to explain some basic setup, features and benefits of using the SSIS connector for Dynamics CRM. SSIS is really useful in system integration and migrating the data from legacy system to a newer one. In my sample scenario I’ll be using Salesforce.com as the data source and Dynamics CRM as target source. (This sample scenario is considering the of the situation of migrating data from Salesforce to Dynamics CRM. So, I hope this post will be beneficial for anyone that migrating data or considering to move from Salesforce to Dynamics CRM).
Note: KingswaySoft provides free SSIS connector to run under BIDS/Visual Studio, therefore it is a great tools for once-off data migration projects. For continuous processes (set the SSIS package schedule for instance), we need to buy the paid license (really reasonable price for this quality of tool + support). For pricing & purchasing info: https://www.kingswaysoft.com/purchase
Part 1: Environment Setup
1 . Visual Studio 2012 with SSDT Installed / BIDS 2008
(Note: Depends on the Production environment; AFAIK, the manifest file generated for deployment will be based on the IDE that generate the SSIS package; e.g. BIDS 2008 is for SQL Server 2008, and SSDT 2012 is for SQL Server 2012)
In this example I’m going to use Visual Studio 2012 with SSDT installed. (Download: http://www.microsoft.com/en-au/download/details.aspx?id=36843)
2. Install SSIS Connector for Dynamics CRM.
Download: http://www.kingswaysoft.com/products/ssis-integration-toolkit-for-microsoft-dynamics-crm/download
Dynamics CRM Connector help Manual:
http://www.kingswaysoft.com/products/ssis-integration-toolkit-for-microsoft-dynamics-crm/help-manual
3. Intall SSIS Connector for Salesforce.
Download: https://www.kingswaysoft.com/products/ssis-integration-toolkit-for-salesforce/download
Salesforce Connector help Manual:
https://www.kingswaysoft.com/products/ssis-integration-toolkit-for-salesforce/help-manual
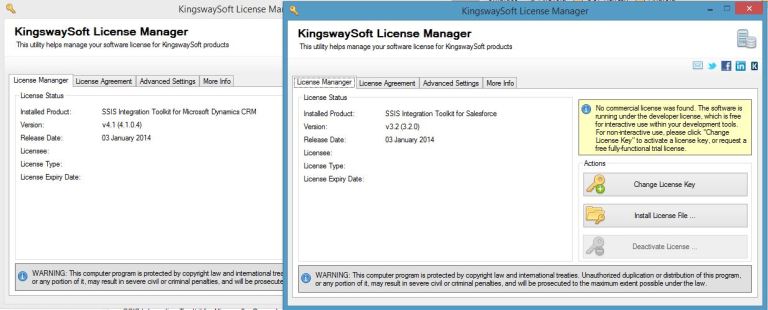
The installers from KingswaySoft will then install the License Managers for both products (Dynamics CRM and Salesforce)
Part 2: Getting Started With “CRM” SSIS Project
For this sample, I’m using Salesforce.com developer edition. To get a free developer license: https://developer.salesforce.com/ then click on Sign-Up.
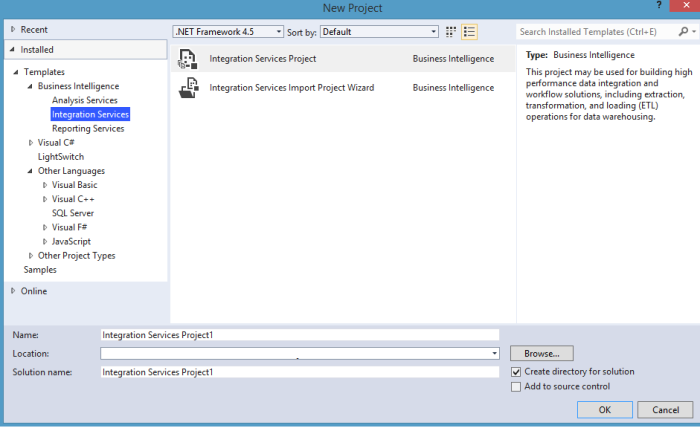
The SSDT installation for Visual Studio 2012 will install Business Intelligence Project Templates in Visual Studio. Therefore, when we create on New Project, the new Business Intelligence Projects will appear on the template list. Select Business Intellience > Integration Services > Integration Services Project:
For a fresh install on BIDS 2008, the Dynamics CRM and Salesforce connector will not appear automatically, to add the Conneciton Manager and the Toolbox components please refer to the help manuals listed above (part 1). Visual Studio 2012 + SSDT installation automatically lists all available pipeline components by scanning the system.
Setup Connection Managers
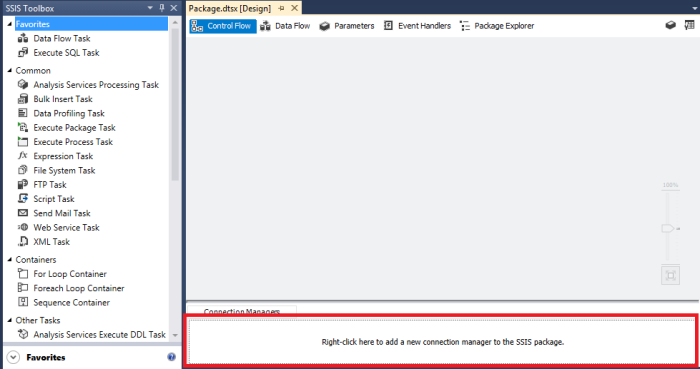
First of all, we need to create connections to both Salesforce (Source) and Dynamics CRM (Target). By Right-Click the Connection Managers box > New Connection:
Dynamics CRM and Salesforce connection will be listed amongst the connection list:
- Create Salesforce Connection Manager:
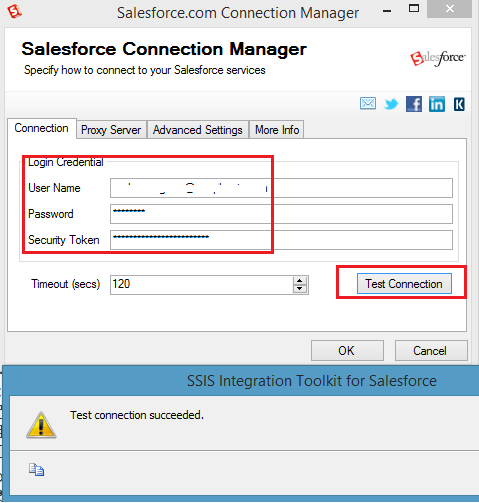
The connection manager will open up the connection window that consist of Username, Password and Security Token to Salesforce org. To test whether connection has been successfully configured, click on “Test Connection” button. Then click OK to create the Salesforce Connection Manager.
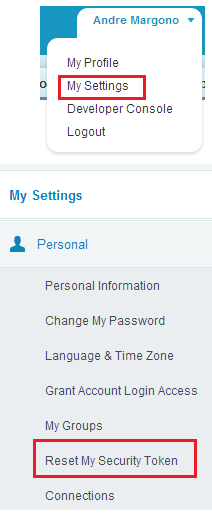
Note: Salesforce connection is highly secured and they implemented Security Token for any API connections that came from outside trusted IP ranges. To reset the security token (in case not provided initially):
- Create Dynamics CRM Connection Manager:
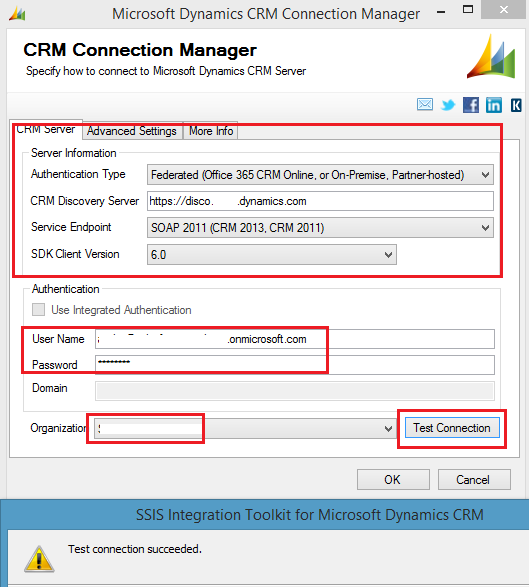
The conncetion manager will open up the connection window that consist of Authentication Type, Discovery Service URL (please note the discovery service only need the first part of the URL. Without the following “XRMServices/2011/Discovery.svc”), Service Endpoint, SDK Client Version, Username, Password and Organisation Name. To test whether connection has been successfully configured, click on “Test Connection” button. Then click OK to create the Dynamics CRM Connection Manager.
Note: (As usual) to get the Dynamics CRM web services URLs, navigate to: Settings > Customizations > Developer Resources
Build SSIS Control Flow & Data Flow
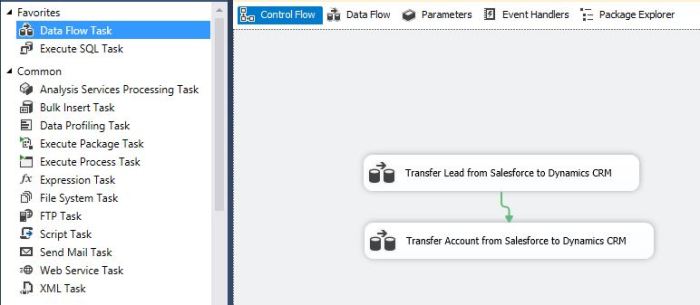
To start building the SSIS package, it starts with the Control Flow and Data Flow. For this example I’ll transfer Lead and Account object from Salesforce to be mapped to Lead and Account Entity in Dynamics CRM. To achieve that: drag 2 Data Flow Task components into the Control Flow and named it with meaningful name, example:
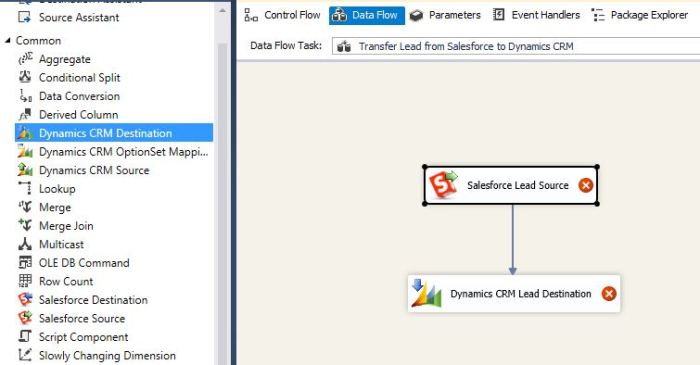
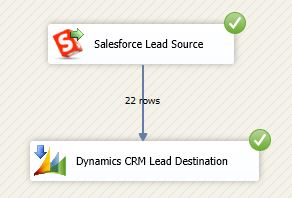
Then drill down to the underlying data flow task by double click the task in Control Flow. Drag Salesforce Source and Dynamics CRM Destination component and link them:
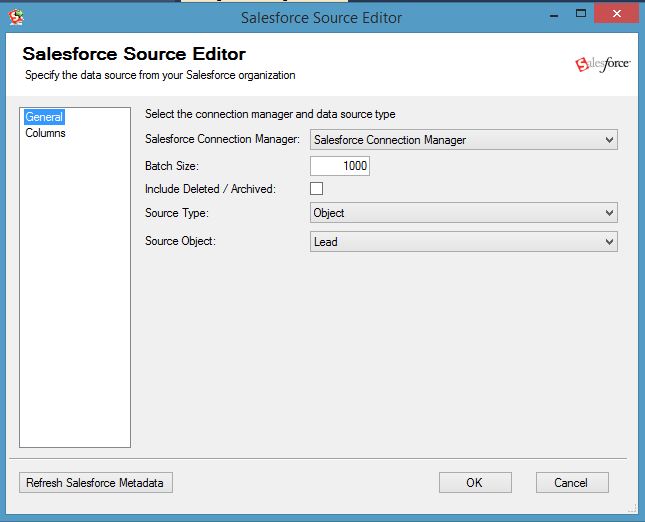
Double Click Salesforce Source to configure the Lead data source. And click on “Columns” to select the required columns as part of the data source. Then click OK:
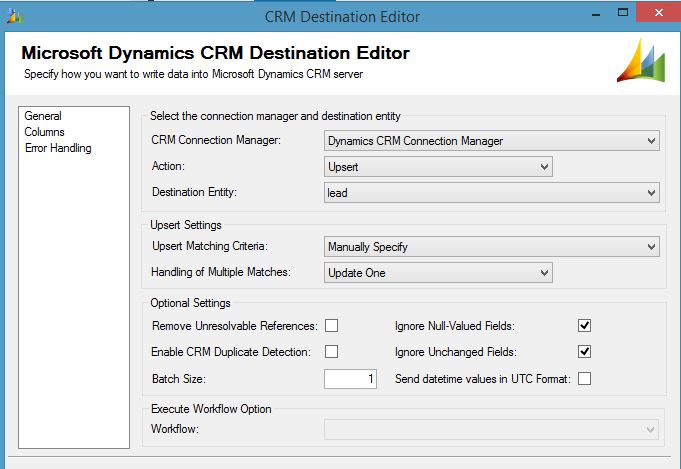
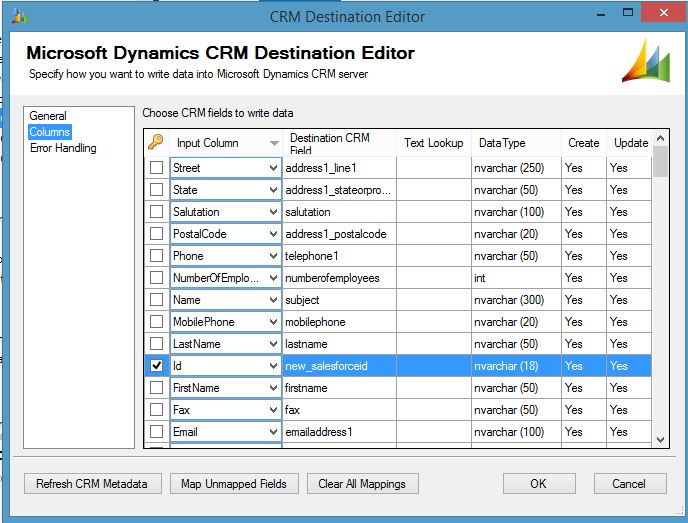
Double click Dynamics CRM Destination to configure the destination and field mappings from Salesforce:
Note: I created a custom text field with 18 character to store the Salesforce id as reference (FYI: Salesforce ID is generated in either 15 or 18 length format, not GUID).
Do the same with the account and run the project:
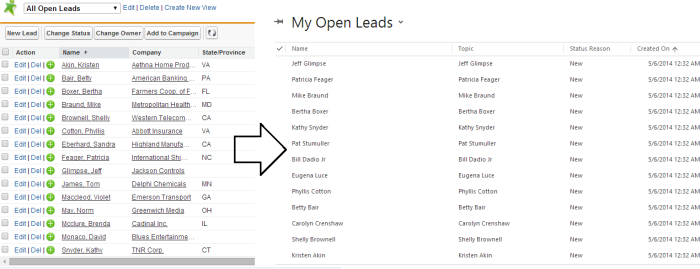
Confirm that the data are transferred from Salesforce to Dynamics CRM:
Bonus Part (Part 3): Deployment Preparation and Package Configuration
Configuration
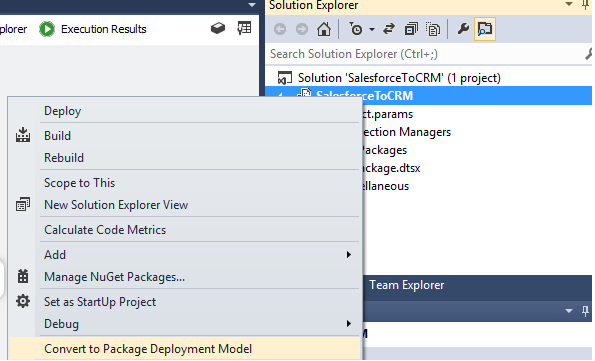
In Visual Studio 2012 + SSDT, we will not find “Package Configuration Wizard” in SSIS when we right click in Control Flow (this is the way to prepare the configurations in BIDS 2008) as the 2012 version introduced the new model for configuration and deployment called the Project deployment model. As part of that change, the old way of doing configuration (environment, xml, parent package, registry and table) is not an option. In the project deployment model, you get parameters and environments. Therefore to create the configuration in the “classic” way, right click on the solution and click on “Convert to Package Deployment Model”:
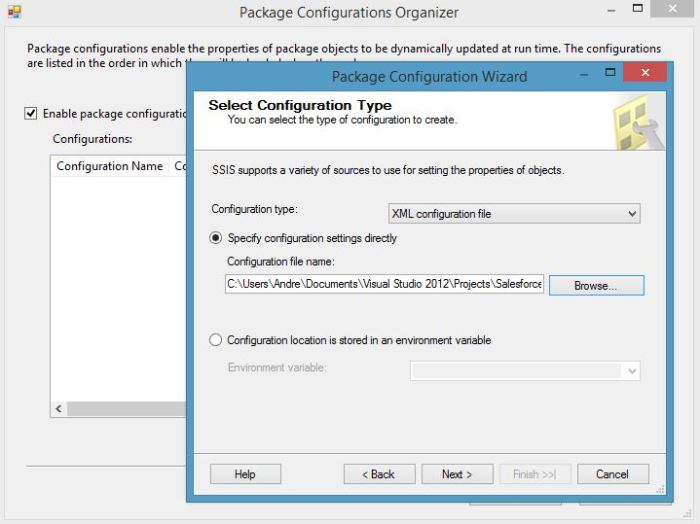
Now the package configurations option is back:
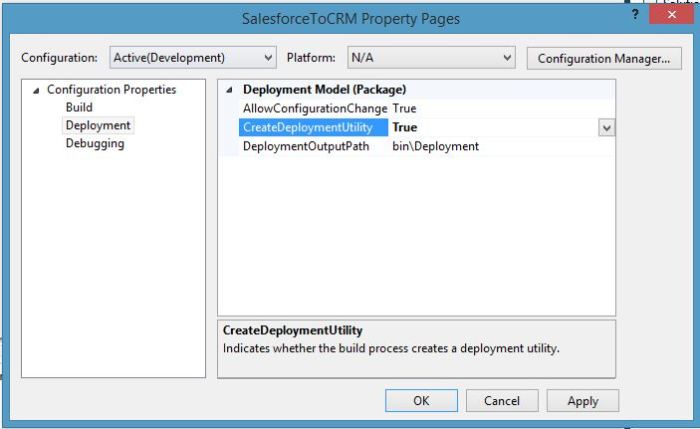
Since we have converted the deployment mode, the deployment .manifest file can be generated through the solution properties and setting the “Create Deployment Utility” to True:
And as the project being built; The deployment files are generated:






You must be logged in to post a comment.