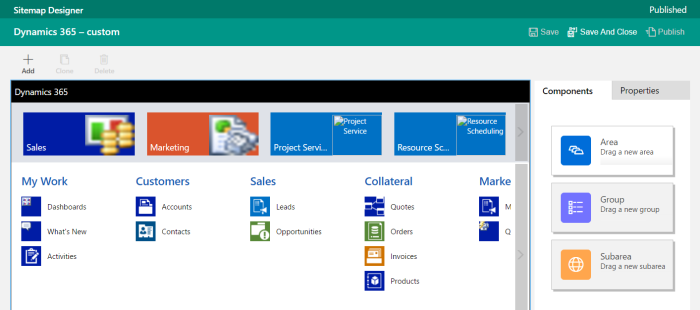
Prior to the release of Dynamics 365, we are helped a lot by XrmToolbox to edit the sitemap without the need of editing the sitemap XML manually. However, with the release of Dynamics 365, it seems the plugin for XrmToolbox doesn’t support the editing of Dynamics 365 sitemap (given now it is possible for a Dynamics 365 deployment to have multiple Apps and each App can have their own sitemap).

So, what should we do now? There are 2 options to configure the Sitemap in Dynamics 365.
Option #1: Creating a new App
With the ability to create App in Dynamics 365, we can create a sitemap that is associated to the App. Following the guide from Microsoft on how to configure/design the app: https://www.microsoft.com/en-us/dynamics/crm-customer-center/design-custom-business-apps-by-using-the-app-designer.aspx
Option #2: Editing the Default Sitemap
Editing default sitemap is similar to what we used to do with XrmToolbox. However, with the unavailability of XrmToolbox to achieve this, we need to use the Dynamics 365 Sitemap Editor to do this.
How to get there? Here are the steps to update the Default Sitemap:
- Open the Solution that you would like to use to contain the sitemap.
- Under Components. Select Client Extensions > Add Existing > Select “Site Map”

- Once it’s added to the solution, click on the Edit button

- It will then open up the Dynamics 365 Sitemap Editor. Conceptually it’s the same as the way we configure Sitemap using the XrmToolbox, but with different user experience and layout.

- Once you are happy with the layout, click Save and then Publish.
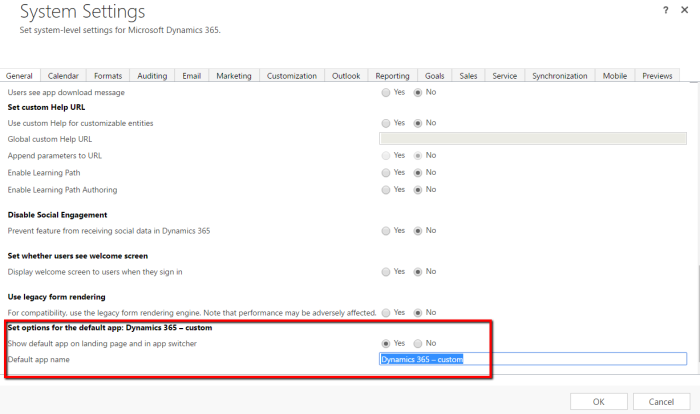
Extra Tips: Change the Default “Dynamics 365 – custom” App name
By default, each Dynamics 365 instance will get a default App. To change this App name:
- Navigate to Settings > Administration > System Settings
- Under “General” tab scroll down to the last options

HTH!

Reblogged this on CRM Backlog.
Thank you!